How to Build a Tiny Home Loft?
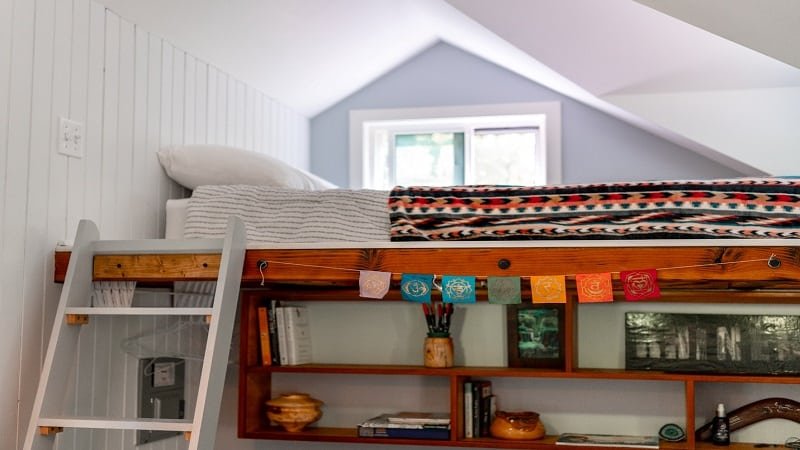
If you are moving into a tiny house or building one from scratch, you may be looking for all the creative and functional ways to best utilize the space inside your tiny home. A great space-efficient interior design idea that is incorporated in most tiny houses is a loft. This wooden structure can serve many purposes but is usually constructed to accommodate a mattress.
Loft beds have been around for a while, and by that, we mean – since the 1400-1500s! Also known as bunk beds, these structures utilize the vertical space in any room and are ‘lofted’ upwards on a wall. This way, you can save floor space without having to sleep on the sofa. Good news for all the DIYers: here is a short guide on how to build a tiny home loft to use this genius idea in your tiny house.
What You’ll Need
Some necessary items to get the job done are listed below:
- Painter’s Tape
- BOSCH Laser Distance Measure
- Ryobi Drill and Circular Saw Starter Kit
- Lag bolts
- Wood Screws
Step 1: Planning and Measurement
As goes with any DIY project, you must plan this out carefully. You may brainstorm some ideas first by browsing the internet and drawing a rough structure on graphic paper. Measure out the distance you want to leave beneath the loft and mark it on the walls. You do not want to bump your head in the loft once it has been built. Other than determining how high you want it to be, also figure out the length and width you want to go for.
Step 2: Buying the right material
Make sure you have all the essential tools, especially those associated with woodwork. You can also check out our post on the best tools for building a tiny home to ensure you have the basics. You will also need wooden planks cut to the correct measurement. We suggest taking help from a professional here or buying pre-made loft bed frames from Ikea.
Step 3: Attaching the Headboard
Now that you have everything you need start off by attaching the headboard to the wall. Find the studs in your wall using a stud finder and mark the points with painter’s tape. Drill pilot holes in the headboard and wall studs – a diameter slightly smaller than the lag bolts, which will be 4-inches. Secure the headboard with these bolts to the wall using a ratchet or wrench.
Step 4: Fixing the Sideboard
Next, you need to attach the sideboard for your loft bed. Simply repeat what you have done in the previous step. Drill pilot holes in the sideboard piece and wall studs and attach the two using 4-inch lag bolts – tightening with a wrench or rachet at the end. A tip is to use a level to make sure all your attachments are straight.
Step 5: Attaching the footboard
To build a loft, you must attach the footboard to the sideboard piece and not to the wall. Drill pilot holes into the face of the sideboard and ends of the footboard, so you can attach the two. Use 4-inch lag bolts to connect both and fasten the job with a wrench.
Step 6: Making and attaching a support post
You will also need a support post for your loft bed just to make sure it is securely held in place and your loft bed is not levitating in the air. The height of the support post should be about 3-4 inches more than the distance between the loft and the ground. Make sure to level the support post against the footboard before attaching the two. Use 4-inch lag bolts and washers for attachment.
Step 7: Attaching the outer board
To build a loft, you now need to clamp the outer board to the support post that you just attached to the footboard. You can ask someone to hold the two together in place if clamping is not an option. Use a level to make sure they are straightly aligned. Drill pilot holes through the face of the outer board and into the ends of the footboard, headboard, as well as a support post. Use 4-inch lag bolts and washers to do the job.
Step 8: Position and attach slat supports
Once the outer board has been attached, the external frame of your loft bed is completed. You need to build the inner structure that will hold the mattress (and later the person who sleeps in it). Those wooden bars in the middle of any bed frame are known as slats. But before fixing the slats, you need to position and attach the slat supports at both the horizontal ends.
Position the first slat support on the inside of the outer board and the second one on the inside of the sideboard. Level both to ensure they are in line with the support post. Secure both slat supports on either side with seven 0.5-inch screws.
Step 9: Add the first and second end supports
Just like attaching the slat supports on the horizontal sides – end supports will be attached to both the vertical ends of the loft bed. Position one on the inside of the headboard and second on the inside of the footboard – level both so they are even with the top of the slat supports which you just attached. Secure both with four 2.5-inch screws on each end.
Step 10: Attach all the slats
Finally, the last step to build a loft bed is to add the slats that will hold the mattress. The number of slats you will need depends on the size of your loft bed – we recommend a standard 14. You can use your better judgement to see how many slats will fit when evenly spaced out. Mark the location with a painter’s tape for all the slats and secure each by drilling pilot holes into each end of the slat supports. Use two 1.5-inch screws for each slat.
Our Final Thoughts
It may be challenging to build a loft all on your own if you have not worked on a wood-based DIY project. Keep in mind that it is okay to seek professional help if you feel lost or get stuck somewhere. Our short guide on how to build a tiny home loft is aimed at assisting you through the process. No matter what the case, plan well and plan in advance. Often, planning is the only difference between a successful project and several wasted hours!